Sunday, 17 April 2011

Buckwheat and Lentil Soup with Vegetables

Buckwheat is a wonderful grain - Easy to cook, versatile and very healthy. Since we have been trying to keep ourselves from eating rice lately this one is a great alternative in addition to bulgur and couscous. I have read many recipes by Heidi where she calls for this grain and the flour of buckwheat - but had never tried it. Last time when we went for grocery shopping I picked a pack up.

Buckwheat gets cooked perfectly in 20 minutes. So if you are looking for a quick and easy meal in one pot, then this is a good choice. With a toddler around, one of the most challenging tasks at home at present is cooking. He does not like me standing next to the hob and enjoys the act of pulling me away all the way to the sitting area - one of the many advantages of an open plan kitchen I think!!!


Here is how to make it:

Ingredients

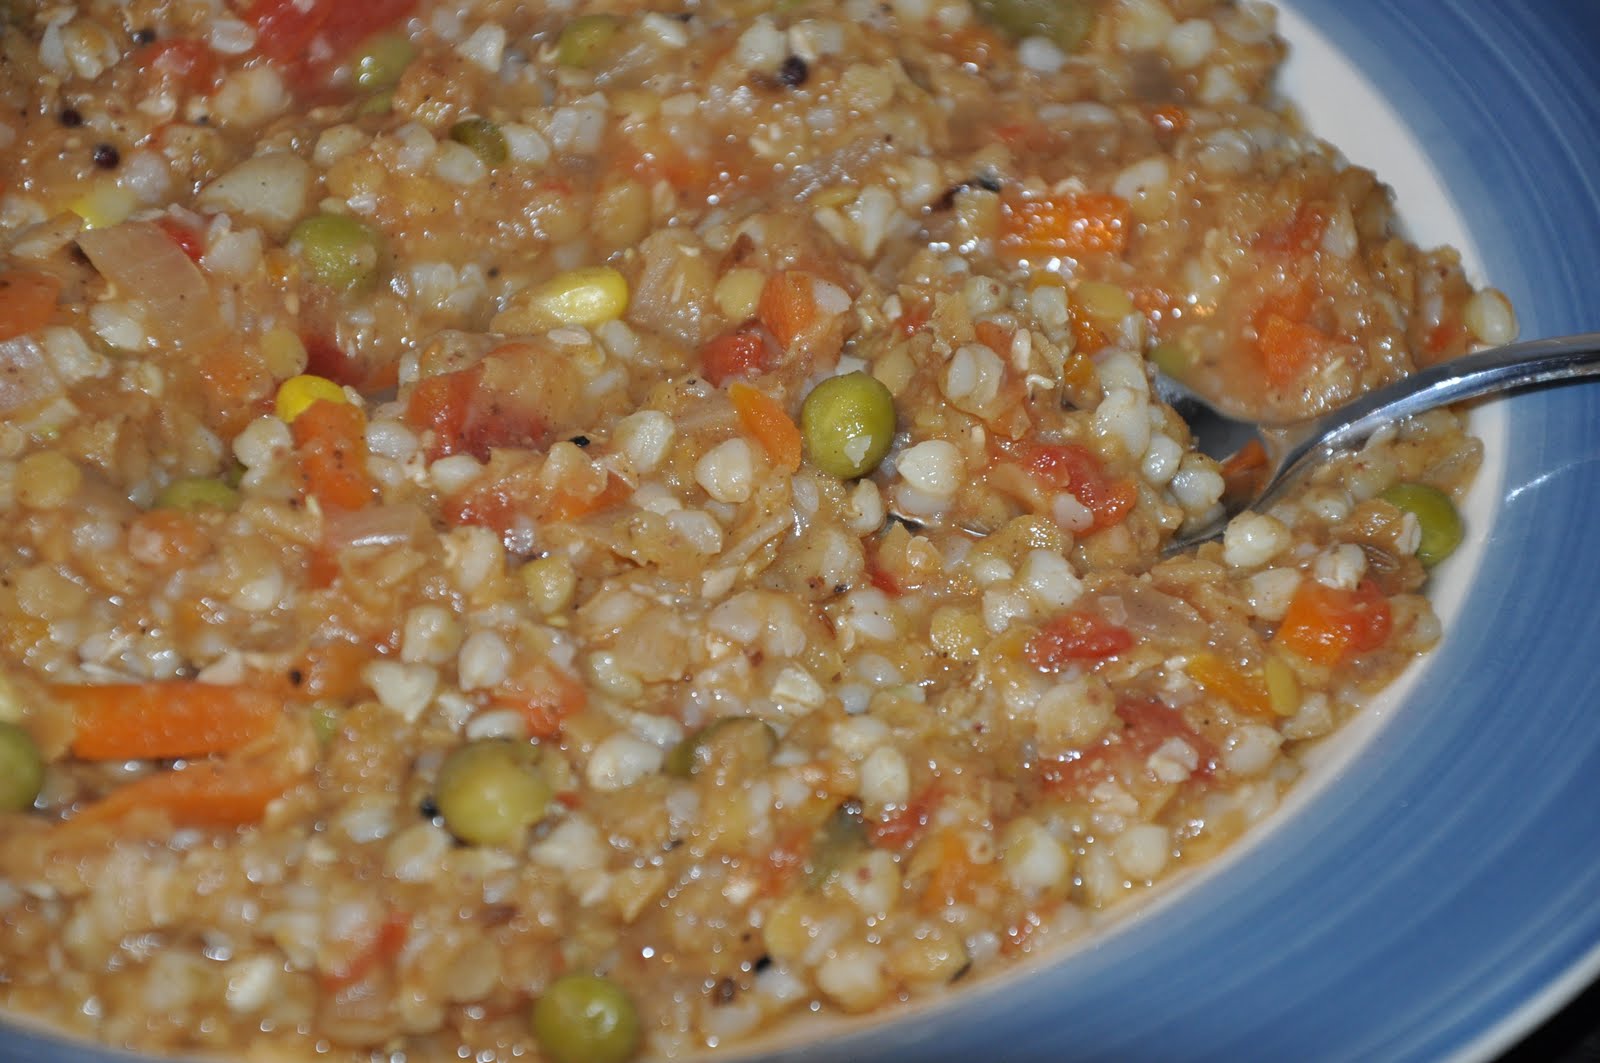
Buckwheat - 1 cup (dry)
Onion - 1 medium
Garlic - 3 pods
Tomato - 2 (I used 2 tbsps of canned tomato)
Mixed Vegetables - 2 cups - I used frozen mixed veg
Masoor Dal - 1 cup
Olive Oil - 2 tsp
Salt to taste

Method:
  • Chop the onions and garlic really fine.
  • Heat some olive oil in a pan.
  • Fry the onion and garlic until they soften. Add some dried oregano if you prefer.
  • Add the tomatoes and cook them for a minute or so.
  • Add about 5 cups water - this should be enough to get the correct consistency but if you feel it is less or more adjust the water accordingly.
  • Add salt.
  • Wash masoor dal and add it to the water.
  • Similarly wash and add the buckwheat and vegetables.
  • Let them simmer for about 20 minutes. Check periodically to make sure there is enough water.
  • When the buckwheat is cooked and softened it is ready. 
  • You can garnish with coriander leaves if you want but I have not added it.
Enjoy the hearty warm soup. 

Saturday, 26 March 2011

Condensed Milk Biscuits - Yummy little treats!


I absolutely loved baking these! My little one is a very choosy when it comes to food (already!) and he likes biscuits and when we have tea he joins us for a little snack. I had baked ajwain (carom seeds) biscuits for him in the last months and he really liked them. We had recently bought some extra light condensed milk and had used only half tin in a kheer recipe. The remaining half was sitting in the fridge and I wanted to use it in some recipe. That was when I came up with this one, of course following a few recipes on the internet but replacing a few (actually - all) ingredients for a healthier version.


These were so yummy and my son liked them very much. I could feel very satisfied as I knew what went into it and I knew they were all healthy ingredients. It is so simple and easy to make and the whole recipe took just under 30 minutes.

Here is how I made them

Ingredients (this quantity made around 30 small biscuits)

Wholewheat flour - 2 cups
Condensed Milk - around 150 ml - I used Extra light Carnation Condensed Milk
Butter - 2 tbsp - I always use Utterly Butterly which is 70% less saturated fat.

Method


  • Preheat the oven to 180 degC.
  • Line the baking sheet with cookie paper or parchment paper.
  • In a large bowl blend the butter and condensed milk together until they turn creamy and well incorporated.
  • Add the flour and mix with a spatula.
  • Once it comes together as a uniform mixture, give a good mix with your hands.
  • Take a small amount in your palm, make it into a nice round ball and place it on the baking sheet.
  • The size depends totally on you as to how big or small you want the biscuits. 
  • Once you finish all the mixture, take a fork and press down on each cookie ball gently. 
  • Bake in the oven for about 12 - 15 minutes until the edges turn golden brown.
  • Cool completely before storing them.

A very yummy companion for your cuppa tea or coffee! Enjoy!

Sunday, 20 March 2011

Extremely healthy Whole Moong Dal Salad

I havent been able to update my blog lately due to many personal engagements, appointments etc. But we have been enjoying this phase in life. Get-togethers, Short Outings, Shopping.... The little one is can walk now and he is keeping us entertained when we go out!

I made this salad for lunch. This one is very healthy as it has wholesome ingredients. I added cooked bulgur wheat but you could also use wholewheat couscous for the base. With simple ingredients which you can find most of the time in your fridge this one is an easy-breezy salad recipe which is also good for you!

This is a very good trick to use up left over moong dal too which I did. The liquid in the dal acts as a wonderful dressing so you dont need anything else! I just added some more healthy veggies and this was such a quick meal especially when you dont have energy to cook something from scratch!


Here is how I made this salad.

Ingredients

Left over moong dal - 2 cups (If you dont have this then cook moong dal and use it)
Cooked bulgur wheat or wholewheat couscous - 1 cup
Grated carrots - 1 cup
Diced cucumber - 1 cup
Chopped green olives - 1/2 cup
Diced tomatoes - 2 (remove the seeds and pulp before dicing)
Mixed fruits and nuts - a handful
Chopped coriander leaves - a handful

Dressing - Mix 2 tsps of your favourite pickle to 2 tbsps of low fat yogurt. Add a few dashes of fresh lemon juice and mix well. One of my favourite salad dressing.

Method
  • If you are not using left over dal - cook the dal and let it cool.
  • Cook bulgur wheat (takes not more than 10 minutes) or soak couscous in boiled water.
  • In the meanwhile grate carrots, dice cucumbers and tomatoes and chop those olives. You can put whatever you have handy in the cupboard in this salad. It is so versatile and lets you play around with the combinations. Chopped boiled eggs could be another good ingredient.
  • Take a large bowl and layer the veggies one by one as you chop/grate.
  • Top it with bulgur/couscous.
  • Finally add the dal and mix everything well.
  • As I said earlier - if you are using leftover dal you dont need any dressing but if you arent make the salad dressing as mentioned above.
  • Scoop this salad into bowls and top it with chopped coriander leaves and nut&fruit mix.

 Every spoonful of this salad presents a plethora of textures and taste for the palette. The crunch from the fruit and nut sprinkle adds a new dimension. A true pleasure of eating a good salad!

Enjoy!

Thursday, 10 February 2011

Oven Baked Onion Pakoras


I havent been able to post any recipes in the blog for a while now! We have been busy travelling to India, my son's first birthday, return to UK and resuming work (after a year long maternity leave)... all these left us exhausted and stressed. Slowly life is returning back to normalcy and we are finding time for ourselves... Eventhough the weather is not supporting us we are finding ways to feel relaxed and cosy...

Onion pakoras are one of our favourite snacks... even the little one seems to have got those genes... :) something that we want to enjoy with evening tea when the weather outside looks horrible, wet and windy.... But I usually get put-off by the whole frying business involved in it... the most difficult part of that whole process I find is storing and using the remaining oil in the following days' cooking. After all we are talking about healthy food aren't we? So no fried food... :) but the tummies were roaring... we wanted some spicy bites very badly...

A quick browse online for some baked snacks came up with baked pakoras in many other blogs... I made little tweaks here and there... the results were amazing! so much so that my little one kept on demanding for more and more...


These are so easy to make and does not take long to bake...

Ingredients:

Besan (Chickpea flour) - 6 tbsp
Ajwain (Carom Seeds) - 1 tsp
Saunf (Fennel Seeds) - 1/2 tsp
Onions (finely chopped) - 2
Green chilli (Finely minced) - 1 (Use more if you want spicier)
Coriander leaves  - handful (mince it finely) - I didnt have any so I didnt add.
Salt - To taste
Olive oil - 1 tbsp (I used Extra Virgin)
Baking powder - 1 tsp
Water - As needed

Method:
  • Preheat the oven to 200 degC.
  • Line a baking sheet with aluminium foil.
  • In a mixing bowl place all the ingredients except water.
  • You have to mix the onion first with everything to see how much more water is needed.
  • Add water 1tbsp at a time, until you get a thick batter (not pourable batter, the one that can still hold it shape when scooped)
  • Place little scoopfuls onto the lined baking sheet.
  • Bake it in the oven for 15 - 20 minutes.
  • You will get a nice aroma and the bites will get golden brown on the outside.
  • Keep checking based on  your oven settings and once they are evenly golden brown, take one out and test (and taste!!!) before taking the whole batch out.

We enjoyed these tasty little bites with some masala chai... You could even have them with some dipping sauce or ketchup on the side.. :)

Tuesday, 5 October 2010

Yeast Free Wholemeal bread


This was not my first attempt to make bread at home. The previous experiments were not very pleasant.. I am not sure what went wrong. Lately R and me have started experiencing trouble eating foodstuff with yeast especially bread i.e store-bought... Having said that I always crave for a toast still. So I was planning to try baking bread but without any yeast.

This one surprised me with the taste and aroma... R really liked it and most of all he could eat it without having to worry about the untoward side effects of eating usual bread. It was such a hearty yummy bread that we enjoyed it just as it was, with soups and for breakfast. R kept on saying that this was the BEST BREAD that he EVER ATE...  which was THE VERDICT for me because he is a very honest customer...


It took me 40 minutes totally to bake this bread. I added some seeds and extra virgin olive oil. I am going to try olive bread, sundried tomato bread and honey nut bread in the coming weeks...

Ingredients

Wholemeal bread flour - 3 cups
Baking powder - 4 tsps
Olive Oil - 1/4 cup
Water - 1 1/2 cups
Milk - 2 tbsps
Mixed seeds (Optional)
Salt - 1 tsp

Method


  1. Preheat the oven to 200 degC.
  2. Combine the flour, baking powder and salt and mix well.
  3. Add the seeds.
  4. Add water, oil and milk. Use your judgement to achieve the correct consistency. Dont add everything at once. See if you need more or less liquid and add accordingly.
  5. Mix everything together with hands and knead into a firm, moist but not sticky dough. (pretty much like chapathi dough but a bit more moister than that)
  6. I made it into 2 round loafs but you can use your imagination. You could even use a loaf tin.
  7. Bake it in the oven at 180 - 200 degC for about 30 minutes.
  8. To check, turn the loaf upside down (be careful not to burn your fingers) and tap it firmly. If you get a hollow sound.


Dont go by the looks... You have to taste it to believe it... :)