Friday, 16 September 2016

Pepper and Cumin - Remedy for relieving upset stomach


Today's post is about the simplest but very natural home remedy for those days when you feel heaviness in your stomach and want something soothing to help make you feel lighter. Cumin and Pepper have always been the stars of many medicinal preparations connected with stomach problems. This recipe is also from Amma's kitchen! Amma uses this combination of Pepper and Cumin in many dishes - Rasam, Thogayal (wet thick chutney) etc. This powder that uses Cumin and Pepper (Milagu Jeeragam) is usually mixed with rice which is called SAMBA RICE. Its very simple yet a comfort food that will surely make you feel much better especially if you have been experiencing heaviness in your tummy!


Ingredients:

Cooked Rice - 1 cup
Ghee - 1 teaspoon
Cashews - a few
Green chilli - 1
Mustard Seeds - 1/2 teaspoon
Urad dal - 1 teaspoon
Curry leaves - a few
Asafoetida - a pinch - optional

To dry roast and powder:

Pepper corns - 1 teaspoon
Cumin Seeds - 2 teaspoons
Salt - To taste

Method:

For the powder

  1. Heat a pan and dry roast pepper corns first, cumin seeds next and switch off the flame and dry roast salt for a few seconds.
  2. Powder these in a spice grinder or mixie coarsely. You can even use mortar and pistil. It is preferable to keep the powder on the coarser side.
For the rice
  1. Heat up the ghee
  2. Put the mustard seeds and when they stop spluttering, add the urad dal.
  3. Half way through urad dal turning golden brown, add the cashews
  4. If you are using green chilli add it at this point.
  5. Add the springs of curry leaves and Asafoetida.
  6. Add the cooked rice, the powder and mix well.
Enjoy! 


Monday, 5 September 2016

Back to blogging with Amma's special recipe! - Drumstick leaves chutney powder


Its been more than 4 years since I posted anything in this blog. I cant even start telling you about how many changes we have seen in these 4 years - all for good though!!!
 
Today I am sharing a new recipe that my mom (Amma) created a few days ago. I have grown up eating various types of chutney powders (Podi as we used to call in Tamil language) - Kariveppilai podi (chutney powder made with curry leaves), Thengai Podi (Chutney powder with coconut as the main ingredient), Kadugu Podi (made with mustard seeds), Paruppu Podi (made with lentils) etc.
 
These are best enjoyed mixed with hot rice, a dollop of ghee or a spoonful of aromatic Sesame oil. These are extremely adaptable in terms of their use, you can even use this as a chutney powder when you  have your idlis or dosas. (South Indian breakfast items).
 
So the other day she told me she had made Drumstick Leaves podi and I was curious! I thought this would be a brilliant opportunity to resume posting wonderful, wholesome and nutritious recipes in this blog starting with her new invention!
 
Drumstick leaves are very rich in Iron. Its botanical name is Moringa Oleifera. The leaves are the most nutritious part of the plant, being a significant source of B vitamins, vitamin C, provitamin A as beta-carotene, vitamin K, manganese, and protein, among other essential nutrients. When compared with common foods particularly high in certain nutrients per 100 g fresh weight, cooked moringa leaves are considerable sources of these same nutrients. Moringa leaves have been proposed as an iron-rich food source (31% Daily Value per 100 g consumed, table) to combat iron deficiency.

Okay! So we know it is good, right!!! now off to the recipe!

You need:

Drumstick leaves - about half a bunch - cleaned, dry and leaves removed from the stem - yielding roughly 2 cups packed
Salt - Preferably rock salt - to taste
Asafoetida - In the picture is Asafoetida in a solid form but you can also use powder
Dry red chillies - 2 - 3
Urad dal - 4 teaspoons
Channa dal - 4 teaspoons

Method:

Very simple!

  1. Heat a pan / kadai.
  2. Dry roast red chillies, urad dal and channa dal one by one and keep them in a separate plate.
  3. In the same pan heat up half a teaspoon oil and once it is hot fry the asafoetida (whether using solid form or powder form). Make sure it does not burn, keep the heat medium low.
  4. Switch off the flame / heat and put the leaves in the hot kadai. At this point we are only aiming at heating the leaves up not roasting. This actually helps in getting rid of some of the water content from the leaves to increase the shelf life of the powder and to avoid it being a wet chutney as opposed to dry!
  5. Once everything cools down a bit, transfer the roasted / fried contents to a mixer / blender, add the salt and grind to a powder.
  6. Store in an airtight container.
Mix a good 2 spoons of this powder on top of hot rice, add ghee or sesame oil, mix and enjoy!
 
Amma's tip: While preparing any dry chutney powder, if you add the salt to the warm kadai and give a stir (like when we put the leaves) it gets rid of all the moisture from the powder itself and thus prolonging its shelf life and it tastes fresh!


 See you guys soon again with a new recipe (and hopefully better photos)!!! Thanks for reading! Thanks to Amma for the recipe!

Friday, 24 February 2012

Low Fat Gajar Halwa - Carrot Pudding with Milk


Life has been really hectic since New Year! My little one's birthday celebration, job searches, work pressures etc etc... I know I say this at the beginning of my posts more frequently but believe me.. it's been a crazy few weeks... In preparation for a brief getaway to Barcelona I decided to quickly clean up my fridge to make sure I am not returning to see things have gone out of date. I had about a kilo of carrots, some low fat creme fraiche and about a couple pints of skimmed milk... What else could be a better fit than Gajar Halwa to use all those above ingredients???


This recipe comes directly from my mother-in-law's kitchen. I know it is a very common dessert in India but whenever she makes this she manages to turn out better tasting halwa each and every time. I love to sit with her in her kitchen stirring the malai (homemade cream) and chatting away and would never even realise how long have we been in the kitchen... Love and cherish those moments.


 It is so satisfying and relieving to realise that you can make a comfort dessert and eat it knowing that it is good for you! This is one of those recipes and I am so glad I made this. I did not have as much dry fruits variety as the original recipe had - I had just almonds and raisins, but that did not matter at all in this dish. The carrots were perfectly cooked and the milk and cream just gave it a nice shiny finish. Every spoonful was just so comforting!

Here is the recipe:

PS - Depending on how much carrots you decide to use, the cooking time may vary from anywhere between 1 to 2 hours. But the good news is that you dont have to stand besides the hob stirring this constantly! Phew!

Ingredients:

  • Carrots - 1 kg
  • Sugar - 100 gms - Increase or decrease to suit the taste - you can even make it low calorie by using low calorie sweeteners
  • Low fat Creme Fraiche - about 3 tablespoons - You can omit this if you want - this is only optional.
  • Semi skimmed milk - half a litre
  • Almonds - a handful - slivered 
  • Raisins - a handful
This is a very forgiving recipe and so feel free to play around with the ingredients - I am planning to try it next time with some beetroot added to carrots or even pumpkin. 

Method:
  • Wash, peel and grate the carrots using the medium side of the grater. I would not suggest using the fine one as you would end up having a consistency closer to baby food - unless you are making this exclusively for babies :)
  • Place a large, wide pan (like a saute pan or frying pan) on heat and add all the grated carrots to it.
  • Keep the heat on medium, slowly you will start to hear sizzling sound when the juices from the carrots start oozing out.
  • Stir occassionally making sure it is not catching at the bottom. The correct stage we want to achieve is that when you press a spoonful of carrots against the side of the pan the mixture needs to be dry and no juices should come out.
  • At this stage add the milk. As I said if you feel that the milk is too less for the carrots then add more. 
  • Increase the heat a bit to medium-high to let the milk and carrot mixture come to a boil. Once it reaches a gentle boil, reduce the heat, remove the spoon and leave the mixture undisturbed for about 15 - 20 minutes.The milk needs to boil and form the cream on the top - that is the secret of the recipe here!
  • Stir occasionally and let all the milk get absorbed and the carrots cooked perfectly. 
  • Once the mixture turns back to dry, add the creme fraiche and stir well.
  • Give it another 10 minutes and then add all the sugar. Once you add the sugar the mixture will go back to a semi solid consistency but dont panic, this is perfectly normal.
  • Let it cook for another 15 minutes till all the liquid is absorbed.
  • Add the dry fruits and stir well to combine.

What I love about this dish is that it is so simple with a few ingredients but still so elegant as a dessert for any occasion AND it is healthy. Isn't it great to know that you can eat a pudding and still be assured that is good for you??

Enjoy every spoonful.

Monday, 28 November 2011

Melt-In-Your-Mouth Palak Paneer

It feels good to be back after a long break! Things have been really tough in the past months... Health Problems, Work Pressure etc etc. But with the help of our loved ones we were able to get back on track and resume. But it is very amazing to realise how swiftly tides change!

Never mind! Life would be very bland without these I guess!


This dish was made with lots of love by R. My contribution in this was just clicking photos and gobbling it with rotis afterwards... But this was the tastiest palak paneer I HAVE EVER HAD!!!! I am not joking and I am not saying just because it was made by my darling husband! It was really really yummy!

There is something more to this dish. The spinach used in this was the Indian Spinach and not the baby spinach leaves that are meant for salad. I have made the same with the baby spinach leaves and they were not great tasting. Same goes with Paneer - I have seen that the paneer that we bought that were already cubed were not as soft as the ones in blocks. :) Dont know if this is true or if everyone else has also found this!


I know the photos are not very good... thats because we hardly had any patience particularly with the aroma that filled our home and could not resist to stop everything and start eating.. the best part of this was that my toddler son enjoyed 2 whole cubes of paneer with his roti! (that's a BIG achievement for me!!!)

Stories apart! this is how R made it!

Ingredients:

Palak (Spinach) - 2 big bunches, washed, and chopped finely
Onions - 1 big, chopped
Tomatoes - 2, chopped
Paneer - 200 grams
Green chillies - 4 (to taste)
Ginger, garlic - as usual
Panch Phoron - This is a spice mix with 5 different varieties of seeds but if you cant get it you can use the normal cumin seeds for seasoning.
Turmeric powder - 1 tsp
Coriander powder - 1 tsp
Garam masala - 1 tsp
Salt - to taste

Method:
  • Heat cooking oil in a deep vessel and once hot add panch phoron.
  • Add the chopped onions, chillies, ginger and garlic and cook until the onions are cooked through.
  • Add the chopped tomatoes.
  • Make a loose paste by adding the turmeric powder, coriander powder and garam masala with water and add it to the pan.
  • When the tomatoes are cooked and mushy, add the spinach into the pan and let it wilt.
  • Once the spinach has wilted let it cook nicely as it gives out water.
  • the water from the spinach and from the tomatoes should be enough for the whole dish to get a good consistency.
  • When the spinach looks half done (after about 15 minutes of cooking) dice the paneer into cubes and add it straight into the spinach. (Some people have a different style in that they fry the paneer pieces before adding it - We prefer it just plain)
  • Reduce the heat and cook the whole thing for about 20 minutes more or so. Let the paneer absorb all the taste and the spices in the mix.
  • Remove from heat and enjoy with rotis or jeera rice. (or just like that - like I did)
 Hmmmmm!!!! HEAVEN!!!!!! The paneer was so soft and creamy and it literally melted in the mouth.

Thursday, 5 May 2011

Easter Cake Bake Event - Multigrain Coffee Cake with Chocolate Buttercream style Frosting

Probably now my facebook friends know about the Cake Bake Event at my office for which I donated a cake. The funds raised through selling the cake was given to charity. I was very happy baking this cake for such a good cause! The cake was very simple one - coffee cake - but as it was also announced that the best decorated cake will win a prize, I wanted to make it a bit more special with a frosting and some garnishings!
I was very happy that day for many reasons - 1. Mine was the only layered cake there   2. The cake was sold out - not a single piece left over    3. I got feedback from colleagues who came to my desk to say the cake tasted SO good... :) which was very encouraging...

Excuse me for the photos taken at my workdesk... I had literally no time for taking photos at home! Nevertheless I didnt want to miss capturing this cake after all the hard work... R helped me a lot in doing this.. he managed the dinner part the evening before and I had time to frost the cake and decorate it.


I wish I had a chance to take a photo of a slice! Never mind.. I can bake one again!!!

The frosting I used is a chocolate buttercream frosting but without the butter...!! I used ready-to-use Betty Crocker's chocolate buttercream frosting - made life a lot easier and guess what - it is a lot better than using actual butter as this is made with vegetable oil...

Since it was a cake bake event for Easter, I used mini chocolate easter eggs to decorate.

Here is how I made it

Ingredients:

Pillsbury 5 grain chapati flour - 1 cup
Wholegrain pastry flour - 1 cup
Baking powder - 1 tsp
Eggs - 2
Instant Coffee - 3 tsps (adjust based on your preference - I like strong flavors)
Dark brown sugar - 2 cups
Vegetable oil - 1/2 cup
70% less saturated fat butter - 1/2 cup

Method:

  1. Prepare cake pans - I used two 9 inch round pans. Butter/oil the sides and line the base with parchment paper.
  2. Preheat the oven to 180 deg C
  3. Mix the coffee granules in hot water and let it cool.
  4. Mix the flours, baking powder and keep aside.
  5. Beat the eggs, sugar, butter and oil well.
  6. Add Coffee and beat.
  7. Once well beaten, mix the dry ingredients (flour, baking powder)
  8. Divide the mixture into the 2 pans equally and bake them for about 30 mins or until the skewer comes out clean.
  9. Let them cool completely before proceeding.
Decorating:
  1. I applied Ina Garten's method to spread the icing AND making sure the plate remains clean when you finish the icing. Spread strips of parchment paper along the edges of the serving plate before you place the first cake on the plate.
  2. Put the even side of the first cake down and spread some frosting on the top.
  3. Cover it with the top side of the second cake (so that the even side faces up).
  4. Now that you have the regular smooth side, spread the frosting nicely over the top, and then cover the sides.
  5. Smoothen the frosting.
  6. Finish the other decorations and then pull the parchment paper outwards - Leaves the sides of the plate neat and clean...
 
I enjoyed every bit of making this cake.. It tasted so good - I know it because I had baked a small loaf too using the same batter... Above all, we felt great that this cake was baked for a noble cause. 

Sunday, 17 April 2011

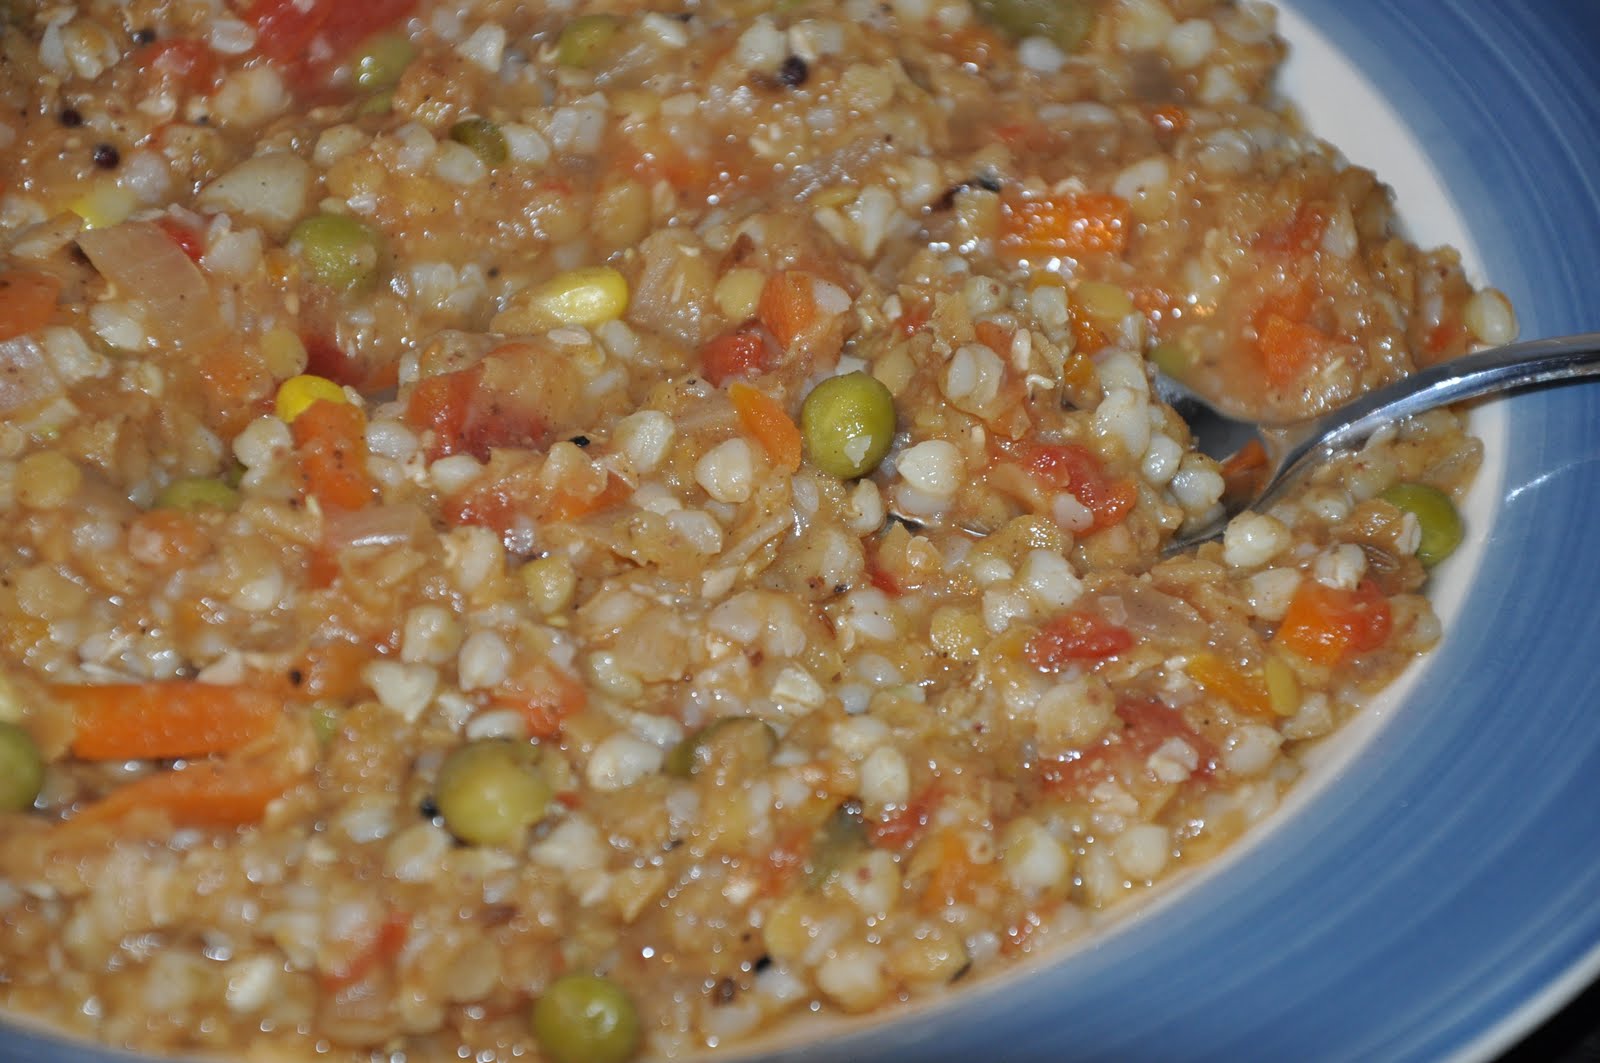
Buckwheat and Lentil Soup with Vegetables

Buckwheat is a wonderful grain - Easy to cook, versatile and very healthy. Since we have been trying to keep ourselves from eating rice lately this one is a great alternative in addition to bulgur and couscous. I have read many recipes by Heidi where she calls for this grain and the flour of buckwheat - but had never tried it. Last time when we went for grocery shopping I picked a pack up.

Buckwheat gets cooked perfectly in 20 minutes. So if you are looking for a quick and easy meal in one pot, then this is a good choice. With a toddler around, one of the most challenging tasks at home at present is cooking. He does not like me standing next to the hob and enjoys the act of pulling me away all the way to the sitting area - one of the many advantages of an open plan kitchen I think!!!


Here is how to make it:

Ingredients

Buckwheat - 1 cup (dry)
Onion - 1 medium
Garlic - 3 pods
Tomato - 2 (I used 2 tbsps of canned tomato)
Mixed Vegetables - 2 cups - I used frozen mixed veg
Masoor Dal - 1 cup
Olive Oil - 2 tsp
Salt to taste

Method:
  • Chop the onions and garlic really fine.
  • Heat some olive oil in a pan.
  • Fry the onion and garlic until they soften. Add some dried oregano if you prefer.
  • Add the tomatoes and cook them for a minute or so.
  • Add about 5 cups water - this should be enough to get the correct consistency but if you feel it is less or more adjust the water accordingly.
  • Add salt.
  • Wash masoor dal and add it to the water.
  • Similarly wash and add the buckwheat and vegetables.
  • Let them simmer for about 20 minutes. Check periodically to make sure there is enough water.
  • When the buckwheat is cooked and softened it is ready. 
  • You can garnish with coriander leaves if you want but I have not added it.
Enjoy the hearty warm soup. 

Saturday, 26 March 2011

Condensed Milk Biscuits - Yummy little treats!


I absolutely loved baking these! My little one is a very choosy when it comes to food (already!) and he likes biscuits and when we have tea he joins us for a little snack. I had baked ajwain (carom seeds) biscuits for him in the last months and he really liked them. We had recently bought some extra light condensed milk and had used only half tin in a kheer recipe. The remaining half was sitting in the fridge and I wanted to use it in some recipe. That was when I came up with this one, of course following a few recipes on the internet but replacing a few (actually - all) ingredients for a healthier version.


These were so yummy and my son liked them very much. I could feel very satisfied as I knew what went into it and I knew they were all healthy ingredients. It is so simple and easy to make and the whole recipe took just under 30 minutes.

Here is how I made them

Ingredients (this quantity made around 30 small biscuits)

Wholewheat flour - 2 cups
Condensed Milk - around 150 ml - I used Extra light Carnation Condensed Milk
Butter - 2 tbsp - I always use Utterly Butterly which is 70% less saturated fat.

Method


  • Preheat the oven to 180 degC.
  • Line the baking sheet with cookie paper or parchment paper.
  • In a large bowl blend the butter and condensed milk together until they turn creamy and well incorporated.
  • Add the flour and mix with a spatula.
  • Once it comes together as a uniform mixture, give a good mix with your hands.
  • Take a small amount in your palm, make it into a nice round ball and place it on the baking sheet.
  • The size depends totally on you as to how big or small you want the biscuits. 
  • Once you finish all the mixture, take a fork and press down on each cookie ball gently. 
  • Bake in the oven for about 12 - 15 minutes until the edges turn golden brown.
  • Cool completely before storing them.

A very yummy companion for your cuppa tea or coffee! Enjoy!

Sunday, 20 March 2011

Extremely healthy Whole Moong Dal Salad

I havent been able to update my blog lately due to many personal engagements, appointments etc. But we have been enjoying this phase in life. Get-togethers, Short Outings, Shopping.... The little one is can walk now and he is keeping us entertained when we go out!

I made this salad for lunch. This one is very healthy as it has wholesome ingredients. I added cooked bulgur wheat but you could also use wholewheat couscous for the base. With simple ingredients which you can find most of the time in your fridge this one is an easy-breezy salad recipe which is also good for you!

This is a very good trick to use up left over moong dal too which I did. The liquid in the dal acts as a wonderful dressing so you dont need anything else! I just added some more healthy veggies and this was such a quick meal especially when you dont have energy to cook something from scratch!


Here is how I made this salad.

Ingredients

Left over moong dal - 2 cups (If you dont have this then cook moong dal and use it)
Cooked bulgur wheat or wholewheat couscous - 1 cup
Grated carrots - 1 cup
Diced cucumber - 1 cup
Chopped green olives - 1/2 cup
Diced tomatoes - 2 (remove the seeds and pulp before dicing)
Mixed fruits and nuts - a handful
Chopped coriander leaves - a handful

Dressing - Mix 2 tsps of your favourite pickle to 2 tbsps of low fat yogurt. Add a few dashes of fresh lemon juice and mix well. One of my favourite salad dressing.

Method
  • If you are not using left over dal - cook the dal and let it cool.
  • Cook bulgur wheat (takes not more than 10 minutes) or soak couscous in boiled water.
  • In the meanwhile grate carrots, dice cucumbers and tomatoes and chop those olives. You can put whatever you have handy in the cupboard in this salad. It is so versatile and lets you play around with the combinations. Chopped boiled eggs could be another good ingredient.
  • Take a large bowl and layer the veggies one by one as you chop/grate.
  • Top it with bulgur/couscous.
  • Finally add the dal and mix everything well.
  • As I said earlier - if you are using leftover dal you dont need any dressing but if you arent make the salad dressing as mentioned above.
  • Scoop this salad into bowls and top it with chopped coriander leaves and nut&fruit mix.

 Every spoonful of this salad presents a plethora of textures and taste for the palette. The crunch from the fruit and nut sprinkle adds a new dimension. A true pleasure of eating a good salad!

Enjoy!

Thursday, 10 February 2011

Oven Baked Onion Pakoras


I havent been able to post any recipes in the blog for a while now! We have been busy travelling to India, my son's first birthday, return to UK and resuming work (after a year long maternity leave)... all these left us exhausted and stressed. Slowly life is returning back to normalcy and we are finding time for ourselves... Eventhough the weather is not supporting us we are finding ways to feel relaxed and cosy...

Onion pakoras are one of our favourite snacks... even the little one seems to have got those genes... :) something that we want to enjoy with evening tea when the weather outside looks horrible, wet and windy.... But I usually get put-off by the whole frying business involved in it... the most difficult part of that whole process I find is storing and using the remaining oil in the following days' cooking. After all we are talking about healthy food aren't we? So no fried food... :) but the tummies were roaring... we wanted some spicy bites very badly...

A quick browse online for some baked snacks came up with baked pakoras in many other blogs... I made little tweaks here and there... the results were amazing! so much so that my little one kept on demanding for more and more...


These are so easy to make and does not take long to bake...

Ingredients:

Besan (Chickpea flour) - 6 tbsp
Ajwain (Carom Seeds) - 1 tsp
Saunf (Fennel Seeds) - 1/2 tsp
Onions (finely chopped) - 2
Green chilli (Finely minced) - 1 (Use more if you want spicier)
Coriander leaves  - handful (mince it finely) - I didnt have any so I didnt add.
Salt - To taste
Olive oil - 1 tbsp (I used Extra Virgin)
Baking powder - 1 tsp
Water - As needed

Method:
  • Preheat the oven to 200 degC.
  • Line a baking sheet with aluminium foil.
  • In a mixing bowl place all the ingredients except water.
  • You have to mix the onion first with everything to see how much more water is needed.
  • Add water 1tbsp at a time, until you get a thick batter (not pourable batter, the one that can still hold it shape when scooped)
  • Place little scoopfuls onto the lined baking sheet.
  • Bake it in the oven for 15 - 20 minutes.
  • You will get a nice aroma and the bites will get golden brown on the outside.
  • Keep checking based on  your oven settings and once they are evenly golden brown, take one out and test (and taste!!!) before taking the whole batch out.

We enjoyed these tasty little bites with some masala chai... You could even have them with some dipping sauce or ketchup on the side.. :)

Tuesday, 5 October 2010

Yeast Free Wholemeal bread


This was not my first attempt to make bread at home. The previous experiments were not very pleasant.. I am not sure what went wrong. Lately R and me have started experiencing trouble eating foodstuff with yeast especially bread i.e store-bought... Having said that I always crave for a toast still. So I was planning to try baking bread but without any yeast.

This one surprised me with the taste and aroma... R really liked it and most of all he could eat it without having to worry about the untoward side effects of eating usual bread. It was such a hearty yummy bread that we enjoyed it just as it was, with soups and for breakfast. R kept on saying that this was the BEST BREAD that he EVER ATE...  which was THE VERDICT for me because he is a very honest customer...


It took me 40 minutes totally to bake this bread. I added some seeds and extra virgin olive oil. I am going to try olive bread, sundried tomato bread and honey nut bread in the coming weeks...

Ingredients

Wholemeal bread flour - 3 cups
Baking powder - 4 tsps
Olive Oil - 1/4 cup
Water - 1 1/2 cups
Milk - 2 tbsps
Mixed seeds (Optional)
Salt - 1 tsp

Method


  1. Preheat the oven to 200 degC.
  2. Combine the flour, baking powder and salt and mix well.
  3. Add the seeds.
  4. Add water, oil and milk. Use your judgement to achieve the correct consistency. Dont add everything at once. See if you need more or less liquid and add accordingly.
  5. Mix everything together with hands and knead into a firm, moist but not sticky dough. (pretty much like chapathi dough but a bit more moister than that)
  6. I made it into 2 round loafs but you can use your imagination. You could even use a loaf tin.
  7. Bake it in the oven at 180 - 200 degC for about 30 minutes.
  8. To check, turn the loaf upside down (be careful not to burn your fingers) and tap it firmly. If you get a hollow sound.


Dont go by the looks... You have to taste it to believe it... :)


Wednesday, 22 September 2010

Saffron Semolina Cake


This was my best experience. Baking this cake has been on my mind since many days... I have a big bag of very very fine semolina... making upma with that turns out like a lumpy porridge... the only options with that semolina are idlis or dosas... I thought I would try using it in a cake instead. Initially I was not very sure about the semolina getting cooked properly but eventually it all turned out into a yummy scrummy delicious cake.

As usual there is no butter in this recipe. I used sunflower oil (thought olive oil would not go with the flavour of saffron here) and a tablespoon of semi skimmed milk. I would love to experiment adding some  dry fruits (like dates, raisins etc) though but this time I just made it plain... believe me.. it tasted heavenly...


This cake had such a nice texture from the cooked semolina and a sweet aroma from the saffron. Since this was the first time I was making this cake I made a small quantity in a loaf pan but this would make a perfect breakfast if made in a square or even round cake tin.


I could not just stop taking photos of this lovely looking cake..

okay.. this is how I made the cake...

Ingredients

Very fine semolina - 1 cup
Wholewheat flour - 1/2 cup
Egg - 1
Sunflower Oil - 1/2 cup
Milk - 2 tbsps - warm
Saffron - 2 pinches
Baking Powder - 2 tsp
Sugar - 1/2 cup - Preferably white so that the color of saffron stands out

Method


  1. Grease the loaf tin with little bit of oil.
  2. Preheat the oven to 180 degC.
  3. In the warm milk soak the saffron until the batter is ready.
  4. In a large bowl whisk the egg, oil and sugar and beat them nicely.
  5. Mix the semolina and flour in a separate bowl with the baking powder.
  6. Once this is done, mash the saffron strands well in the milk and add the whole thing into the wet mixture.
  7. Add the flours and mix well. If the consistency is too thick you could add some milk.
  8. Pour the batter into the cake tin/loaf tin and bake it in the oven for 30 - 40 minutes (but do check it often). Mine got perfectly baked in 30 minutes. 
  9. Test the cake with a knife or a skewer and remove it from the oven when done.
  10. Release the ends with a knife, place the cake on a plate, let it cool down before you cut it. 


Enjoy every bite... :)


Friday, 17 September 2010

Pasta with balsamic roasted vegetables


I got a gift on my birthday from my friend. It was a goodie basket filled with Italian foodstuff. It had Jamie Oliver's pesto, Filipo Berio Olive oil, Some marinated olives, Jamie Oliver bronze fusili, Biscottis and a bottle of balsamic vinegar.

I was very keen on using this vinegar for roasting rather than using in salad dressings. I had some butternut squash in the fridge and one zucchini... So the menu was balsamic roasted vegetables that I tossed with some pasta and it was so yummy that we thought we will make it again and again..


I also added some onions, garlic and tomato in the roasting pan and it was such a nice blend with the pasta...

Here is how I made it.

Ingredients

Butternut squash - 3 cups - cubed
Zucchini - 1 - cubed
Onions - 2 - quartered
Tomatoes - 2 - quartered
Garlic - 6 pods - minced
Balsamic Vinegar - good 4 tbsps
Olive oil - 2 tbsps
Salt and pepper
Wholewheat pasta - 100g

Method

In a big broad bowl place all the veggies.
Mix the balsamic vinegar, olive oil, salt and pepper and give it a good mix.
Toss all these into a baking tray and roast in the oven at 200degC for about 30 - 35 minutes.
Cook the pasta al dente.
Once done mix the roasted veggies and pasta, top it with a tbsp of olive oil and toss well.
Sprinkle some cheese on top if you like.. I prefer parmesan but I didnt have it to hand, so we used some mozzarella... :)
Serve it up in large bowls for a satisfying, healthy dinner....

Sunday, 12 September 2010

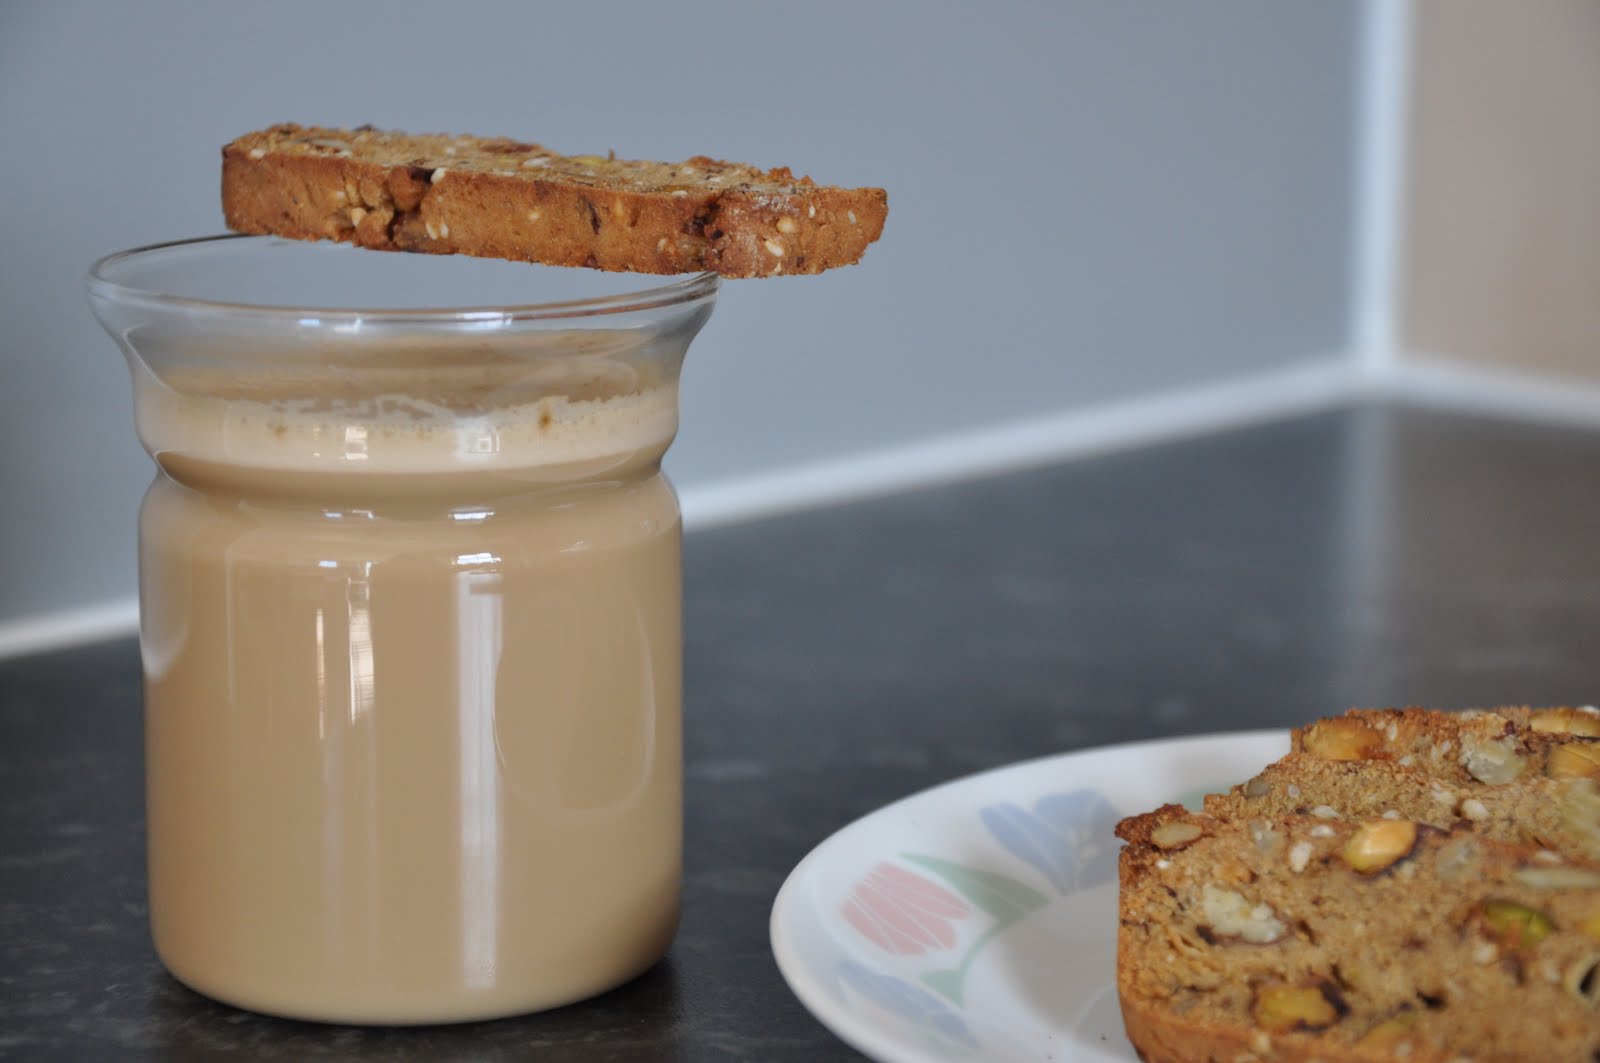
A New Venture - Wholewheat Nut and Seed Biscotti


I am a great fan of Heidi Swanson - her website 101 cookbooks (link in My Favourite Bloggers) is filled with healthy, easy and quick recipes. Most of them are vegetarian, which is good for me. She uses less butter/oil, wholegrains, lower fat ingredients but still turns out yummy, mouthwatering dishes.

I have never baked biscotti before. I have been having this in my mind since many days and was researching on healthy recipes for baking biscotti. I had a couple bookmarked but this one at Heidi's website was very tempting as it uses NO BUTTER at all. We had a relaxing day and in the evening I just thought I will bake something while my baby was enjoying his dad-time.

I followed her recipe but did some minor tweaks. Her recipe calls for a pinch of salt which I didnt put as I wasn't sure how that would taste. Also I mixed 1/4 cup olive oil in the batter.


Ingredients

Wholewheat flour - 1 1/2 cup
Mixed nuts and seeds - I used Pistachios, Pecans, Sunflower Seeds, Pumpkin Seeds and Sesame seeds
Muscavado Sugar - 1/2 cup
Extra virgin Olive oil - 1/4 cup
Eggs - 2

Method

Preheat the oven to 150 degC.
In a dry pan roast the nuts and seeds until you get a nice aroma - make sure you add sesame seed at the very end. Once they are a bit cool, chop them roughly.
In a mixing bowl, whisk eggs, sugar and olive oil. Reserve a couple tsp of olive oil for later.
Mix the chopped nuts with the wheatflour first.
Add the whole dry mixture into the wet mixture and mix.
The dough will be very tight. Pack it into a greased bread loaf pan tightly.
Bake until the loaf is cooked. Mine took about 30 minutes.
Take the loaf out of the oven and turn the heat on to 200 degC.
Run a knife along the edges of the loaf to release it and turn it out onto a clean chopping board.
Using a serrated knife slice the loaf into 1/4 inch pieces. The thinner the better.
Arrange them onto the baking sheet, spray/brush with some olive oil and bake it again for 5 minutes.
Flip the biscottis, apply some olive oil on the other side and bake for 5 minutes.


These crispy and crunchy biscottis tasted so good especially dunk in some good hot coffee. A nice and healthy snack...

I will try out the other biscotti recipes also soon. But for now... I am very pleased about my very first biscotti baking experience.

Sunday, 5 September 2010

Warm and hearty lentils and lettuce soup


How many times have you felt so tired but still wanted to relish some comforting, easy-to-make, warm dinner? Well... these days it happens to us a lot... That too on weekends after a day's outing, putting the baby to sleep and then... the last thing I want to do is to stand in the kitchen for an hour to roll out rotis... This soup is perfect for such times. 

I would rather not serve it as a starter because I think this is so filling and satisfying that there would be no chance for the main meals. This is a complete meal in itself. With the warmth of the red lentils, I added half a head of iceberg lettuce, I was quite surprised by the taste it brought out. 

The croutons (they were so big that they covered the whole soup bowl.. the soup rather looks like a crouton soup) were store-bought but still they were baked not fried. A sprinkle of half fat mozzarella (if you like) or parmesan would be an added burst of flavour. These red lentils are so easy to cook and they take only 10 minutes or so to get well cooked.


This is how I made the soup:

Ingredients

Red Lentils - 1 cup (serves 2)
Iceberg Lettuce - half a head
Onions - 1 medium
Garlic - 3 cloves
Vegetable Stock - Optional (you could use water)
Tomato - 1 (if you are using a puree then add just 2 tsp)
Salt and pepper 
Croutons
Mozzarella or Parmesan

Easy-Peasy method

Heat up some olive oil in a deep pan and saute the onions and garlic until they are cooked.
Add the tomatoes and give it a stir for 2 minutes.
Wash and add the lentils.
Add vegetable stock or water and bring it up to a boil.
After 10 minutes check the lentils and add the lettuce leaves and turn off the heat. 
After 2 minutes, with a hand blender or in a mixie, blend everything together. 
Serve in big bowls with croutons and cheese if you like. 
Dont forget the freshly ground black pepper... 

Slurp... Enjoy a healthy dinner/lunch.. :)

Tuesday, 31 August 2010

Hazelnut Mocha Cake


You must be wondering what is healthy in it!!! Well... read on to find out how! Healthy eating does not mean all soups and salads. Sometimes you also can satisfy your sweet tooth while taking care that it does not make you deviate from the healthy eating path :) This recipe does not need any butter.

This is a very easy-peasy cake and utterly delicious. Initially when I heard the name I thought this must be something very complex but I made things simple. This thought just flashed suddenly in my mind on one afternoon when putting my baby to sleep. When I checked my food cupboard I had everything that I needed. There was no reason to wait.

As usual I made this with wholewheat flour.. I used nutella (it has hazelnuts and chocolate) and instant coffee granules.. so there you go.. hazelnut mocha (coffee and chocolate) cake... It was so yummy and such a great accompaniment at tea-time or as a dessert after dinner.


Here is how I made the cake.

Ingredients

Wholewheat flour - 2 cups
Nutella - generous 2 tbsps
Muscavado Sugar - 1/2 cup - Nutella has all the subtle sweetness you need so you wont need that much sugar
Vegetable Oil - 1/2 cup
Eggs - 2
Instant Coffee granules - 4 tsp (dissolved in 1/2 cup hot water and cooled)
Baking Powder - 1 tsp
Roasted chopped hazelnuts - Optional - 1/4 cup - I didn't have any in my cupboard but you could use it.

Method

Preheat the oven to 180 deg C
Butter the cake tin and keep it ready.
In a large bowl beat the eggs well.
Add the sugar and oil and beat until they are well mixed.
Add the dissolved coffee and the nutella and beat again.
If you are using chopped hazelnuts add them to the wheatflour and mix them.
Now add the flour, baking powder to the egg mixture and mix them.

Tip the whole mixture into the cake tin and bake it for about 45 minutes. Check the cake with a tester or a clean dry knife for doneness.

Dig in...

Tuesday, 24 August 2010

Steamed parcels of goodness.. Rava Idlis...


I have always had problems with making traditional (urad dal/rice) idlis, fermentation being the most difficult part. Lately, I had mastered that also by using the oven. The idlis used to turn out perfect, fluffy and well cooked. Who would want to resist these yummy goodies dunked in sambar and chutney... not to mention the hot fresh coffee to accompany it... :)

Given all the yummy points about traditional idli, when you run short of time and/or energy, this one is a perfect breakfast/lunch/dinner option. You can make them in a jiffy, they are absolutely healthy since they are steamed and I also added a vegetable to it.

Here is how I made them... The quantity given below made 12 idlis.

Ingredients:

Rava (Sooji) - 1 1/2 cups
Carrot - 1 - Grated - You can use chopped green beans, grated zucchini, finely shredded cabbage anything...
Green Chilli - 2 - finely minced.
Coriander - Finely chopped - a handful
Yogurt - 1 1/2 cups
Salt - to taste
Oil
Mustard Seeds - 1/2 tsp
Channa dal - 1/2 tsp
Hing - 1 pinch

Method:

Heat up some oil and when hot, add mustard seeds to pop.

Add the channa dal and hing and let the dal turn golden brown.

Add the rava and roast until the rava is well cooked. (If you store roasted rava this is even faster)

Once well mixed, remove from heat and add the grated carrots, chopped coriander, minced green chillies, salt and the yogurt, mix it all together.

If the mixture is very dry-ish, add some room temperature water to loosen it up. Basically we are trying to get the idli batter consistency here. Adding more yogurt is also fine. Use your judgement.

Leave the mix alone for 15 minutes.

Apply some oil on the idli moulds, Spoon the mix in them and steam for 8 - 10 minutes. But do check at 6 minutes because mine was done in 6 minutes (I used a microwave idli maker and my microwave is a bit too powerful).


Enjoy with some sambar, chutney or just as it is with some coffee. We found hummus goes well with these too...